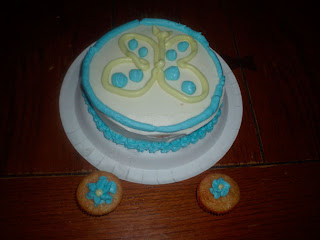
Last night, my Relief Society activity was on cake decorating. The young woman who was our teacher brought small cakes for everyone, so we could try the techniques she taught us. I am not an expert at this by any means, but here are a few of the things she taught us:
 |
| Here are the cakes that I decorated. |
- Put a small glob of frosting on the platter before you put the cake on it to help keep it in place.
- Place a huge glob of frosting on the center of the cake and spread out from there. If you need to add more frosting, add it to a spot that already has some frosting on it. Frost the top first, then the sides.
- Some cakes - like chocolate - are crummier than others. A crumb coat can be made to help: Spread a thin layer of frosting over the cake, let it stiffen completely, then put on another thicker layer of frosting on top of that.
- When the frosting has dried to a point that if you touch it, it doesn't stick to your finger, take something flat (we used index cards) and smooth the frosting to get rid of ridges and bumps left by the knife.
- She prefers the consistency of homemade frosting to store-bought frosting. She says she doesn't use a recipe but combines shortening, milk, vanilla and powdered sugar to a consistency that if she sticks a knife in it, it doesn't fall over, but kind of leans to the side.
- Decorating tips can be stuck in the corner of zip-lock bags with the corner cut off. We also used bags without tips, with just a tiny hole cut in the corner to make lines.
- Place piping or decorations around the base of the cake to hide where the cake touches the plate to disguise any gaps.
- Decorating tips with star-like shapes in the tips can be used to make different types of flowers, by holding the bag at a 90 degree angle, squeezing out some frosting, and either twisting before lifting up, or just lifting up. (A drop of a contrasting color in the center of the flower helps, too.)
I enjoyed the activity, and my family and I enjoyed eating the cakes when I returned home.


Comments
Post a Comment